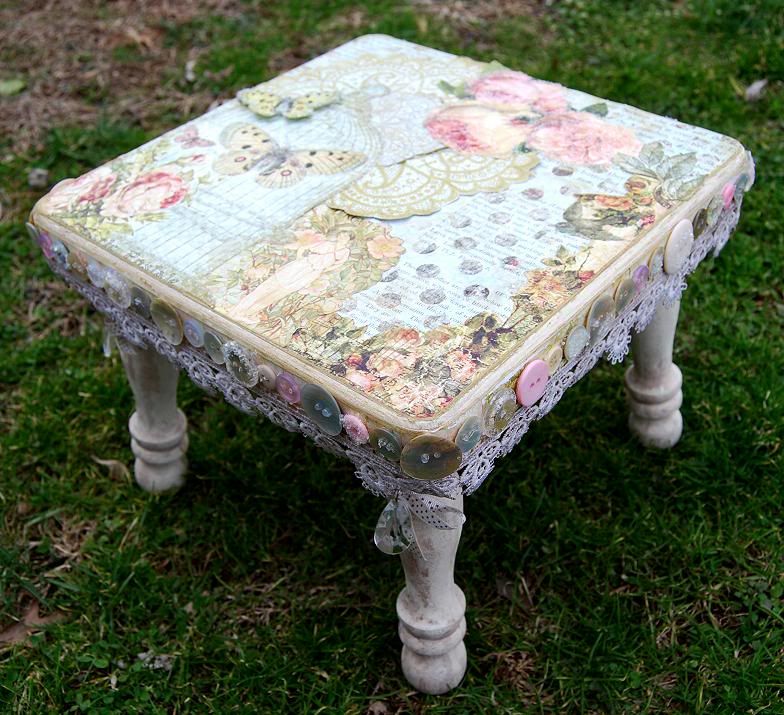
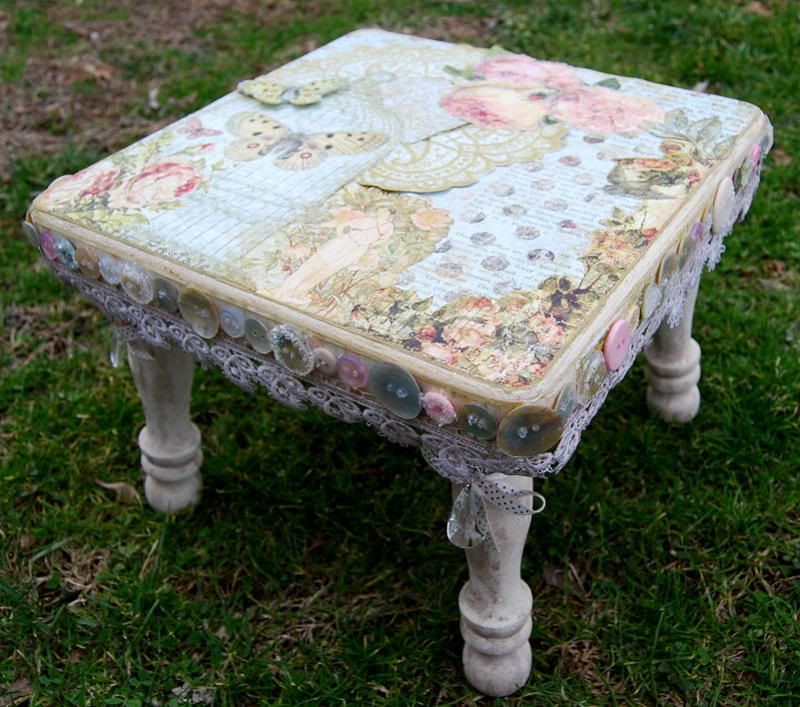
Good Morning, how are you all today. I have a fun post for you this morning. I recently got this stool back after it was requested for publication over 6 years ago. Occasionally magazines do put things up and new editors come on, then find said items. I had to let the editor know that my stool was made with papers and items so old, that the company was out of business! When I got this stool back, I was determined to remake it into something pretty and shabby and vintage. I used some of the new collections from Pink Paislee and layered lots of pretty images on the top. There is a ton of glitter on this baby too!
And who knows.. I've submitted it again, perhaps this time old betsy the stool will actually grace the pages of a magazine. ;)
VintageStool
Designer - Kristen Swain
Designer Tip- I found this stool and had covered it with some very country kitch papers several years ago. With my changing style, I decided it was time for a makeover. I love the vintage shabby style so popular now, and I created my stool with that in mind.

Supplies-
Stool- flea market or craft store
Papers- Pink Paislee
Glue Arts Glue Glider Max, Glue Glider Pro, Hot Glue Gun, UCutIt foam
Glitter- Sulyn Industries
Liquid Glue
Lace trim/Buttons/ribbon/gems- craft supply
acrylic paint/sandpaper- hardware supply
distress ink- I used Antique linen Tim Holtz ink.
Instructions-
1. Remove as much paper or paint from stool, then sand well and paint with cream acrylic paint. Antique with brown acrylic paint watered down.
2. Use the Glue Glider Max to adhere strips of adhesive completely over top of stool.
Adhere paper to top of stool, then use sand paper to sand off edges of paper hanging off of wood.
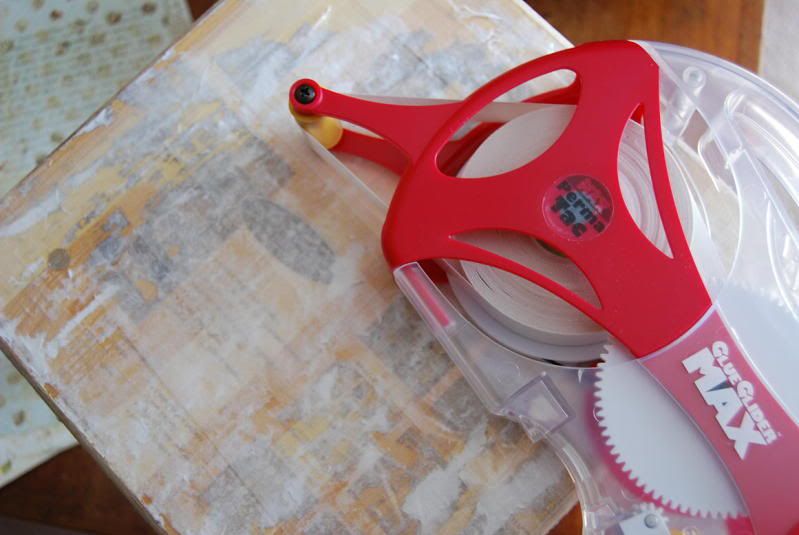
4. Use Glue Glider Max to adhere strips of paper to side edge of stool, then sand off any overhanging edges.
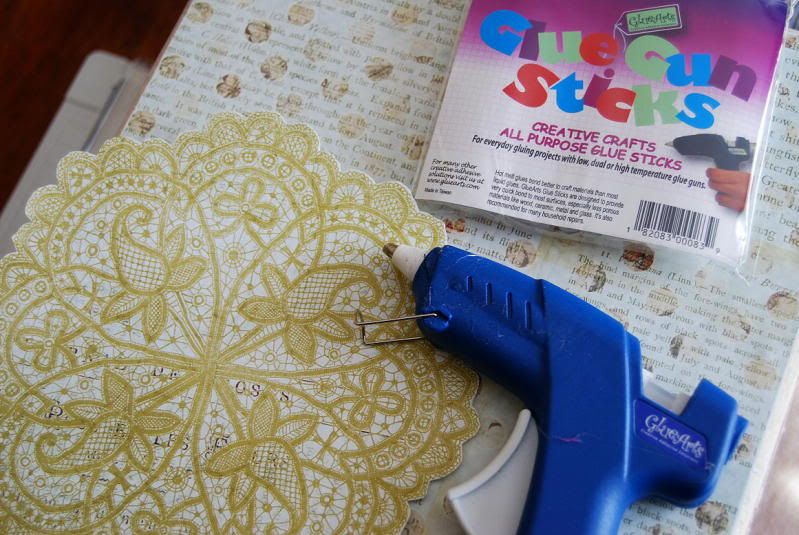
5. Use Hot glue gun, Glue Glider Max and Glue Glider Pro to adhere any cut out images of paper to decorate the top of the stool. Inking edges with antique linen ink as you go.

6. Use the Hot Glue Gun to adhere buttons around the edges of the stool, also adding on antiqued lace with Hot Glue Gun.
7. Use UCutIt foam to pop up single butterfly on stool top.
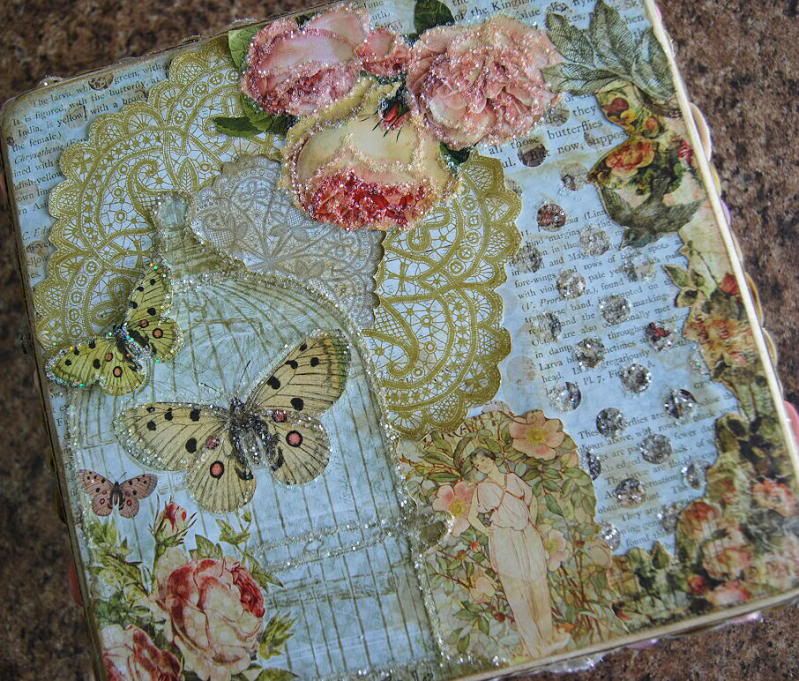
8. Use liquid glue to trace around images on stool top, and around some buttons on each side, adding glitter before glue dries.
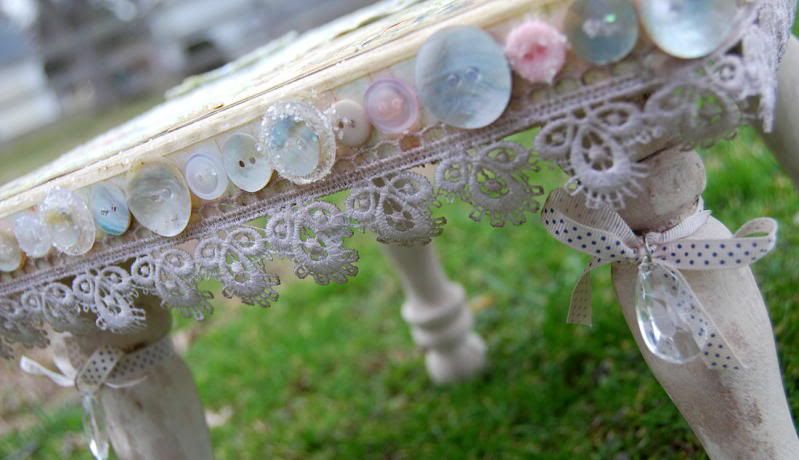
9. Knot and tie bows on thin ribbon, add two gems on large jump rings to each bow and tie to each leg.
take care and have a great day!


15 comments:
Well, it's just gorgeous!
Wow, what a creation. I applaud your perserverence in getting it back, finally! Good luck!
Ohhhh My!!!!! That is just AWESOME!!!! I must make one!!!! Oh darn....no stool! whatever should I do??? I guess I will be "forced" to go thrifting this weekend....sighhhhhh. The things I put mysxelf thru for ther love of art :) Seriously.....straignt into my inspo folder...I am in love with this!!!!
this is unbelievably gorgeous!!! WOW! amazing job :)
What a beautifully amazing project! And so adaptable to any style!
Kristen, This is so beautiful! What a great inspiration to look at other objects to decorate. Penny
This is an amazing transformation! I'm in love!!!
I'd say your stool should be on the front cover. Love it!
Very beautiful! 6 yrs? Wow, that's pretty bad, but now it's repurposed again, so that's a good thing.
I LOVE the stool and want to make one. I have someone that will make me a stool. What are the dimensions of your stool? Thanks!
Also would like to know what paper you used for the roses at the top of the stool....GORGEOUS!
How adorable!
SO, SO unbelievably amazing! My jaw just dropped when I saw this on the Glue Arts blog today. :)
Kirsten this is such a beautiful project and so much work involved... the end result is superb! :)
Fabulous!
Post a Comment