Happy Friday friends! I have a super giveaway for you today. Glue Arts is celebrating the new Pro+ Glue Glider. These new cartridges will flow in either direction- allowing you to push and to pull your adhesive however you want to put your adhesive down.
I am giving away a new Cartridge and Handle set, all you have to do is become a follower here on my blog and also leave me a comment sometime this weekend and I will pick a winner on Monday.
So, to give you some pretty things to talk about- how about my latest Halloween crafts using Glue Arts adhesives.
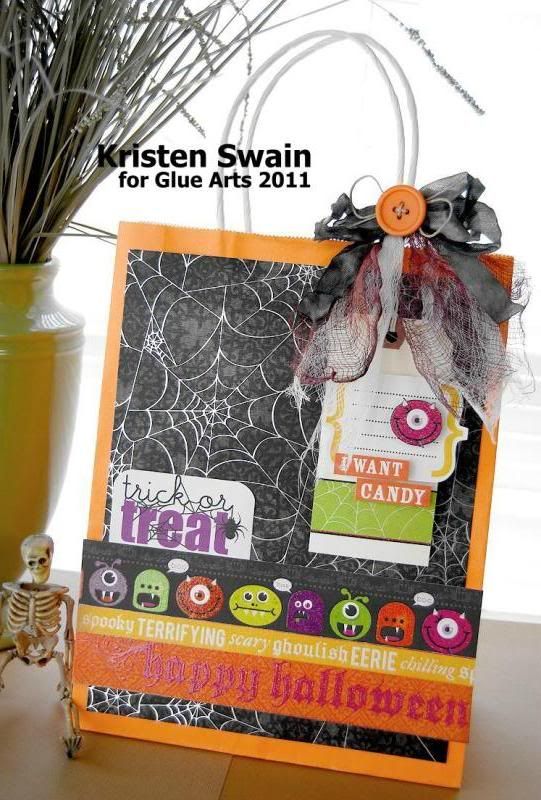
Trick or Treat Bag
GlueArts Designer: Kristen Swain
Materials:
DieCuts with a view- Midnight Spell Papers and Diecuts
Glue Arts- UCUTIT Foam, Perma Tac and Adhesive Squares
Button/Twine
Gift Bag
Cheese cloth
Spray Mist- Haunted and Jack O Lantern
Office Tag
deco scissors
ribbon- www.scrapinkris.etsy.com
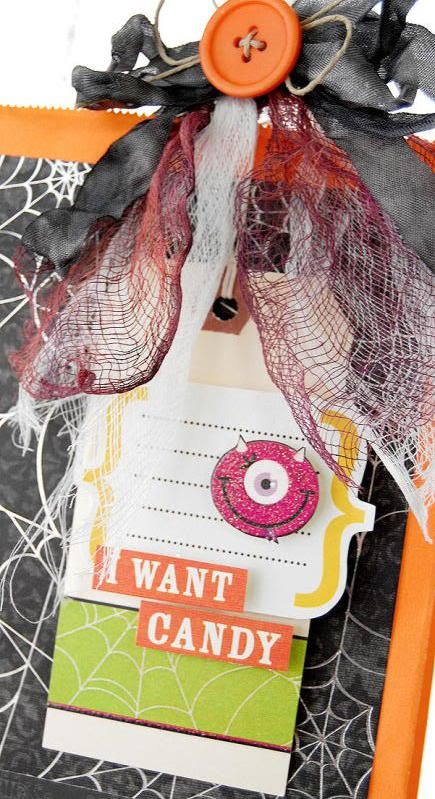
1.Adhere block of spider web paper to front of bag.
2. Cut border paper into strips, adhere strips to bag using Perma Tac. Use deco scissors to trim diecut quote and adhere just under border strip.
3. Spray cheese cloth with mist and let dry. Tie ribbons and cheese cloth onto bag handle, adding button and twine to center bow with adhesive squares.
4. Adhere border strip to office tag, use UCUTIT foam to adhere journal spot to tag, cut out small monster from extra border strip, adhere with UCUTIT foam, then cut apart diecut wording, adhere to tag with UCUTIT foam.
5. Tie Tag onto bag.
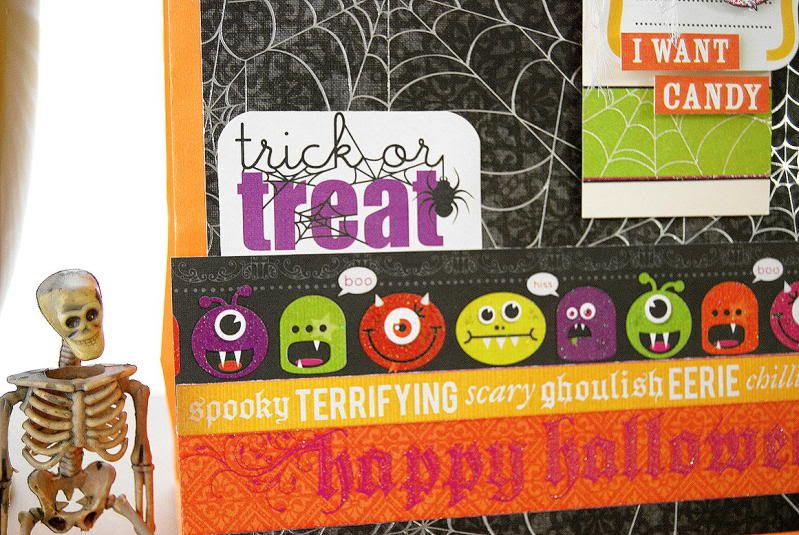
DieCuts with a view- Midnight Spell Papers and Diecuts
Glue Arts- UCUTIT Foam, Perma Tac and Adhesive Squares
Button/Twine
Gift Bag
Cheese cloth
Spray Mist- Haunted and Jack O Lantern
Office Tag
deco scissors
ribbon- www.scrapinkris.etsy.com

1.Adhere block of spider web paper to front of bag.
2. Cut border paper into strips, adhere strips to bag using Perma Tac. Use deco scissors to trim diecut quote and adhere just under border strip.
3. Spray cheese cloth with mist and let dry. Tie ribbons and cheese cloth onto bag handle, adding button and twine to center bow with adhesive squares.
4. Adhere border strip to office tag, use UCUTIT foam to adhere journal spot to tag, cut out small monster from extra border strip, adhere with UCUTIT foam, then cut apart diecut wording, adhere to tag with UCUTIT foam.
5. Tie Tag onto bag.

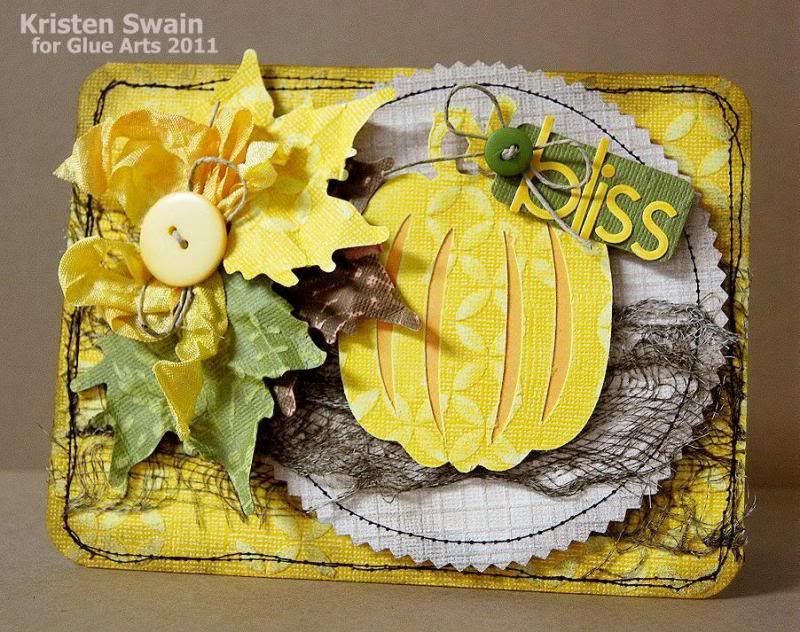
Bliss Autumn Card
GlueArts Designer: Kristen Swain
Supplies:
Cardstock/Sanding Block- Coredinations
Glue Arts- UCutIt foam, Perma Tac, High Tac, Adhesive Squares
Pinking Scissors
Ink- Ranger- Van Dyke Brown
cheese cloth
Die cuts- Cricut Expression
Cartridges- Designers Calendar ( maple leaf) Damask Decor (pumpkin)
sewing machine
ribbon- www.scrapinkris.etsy.com
letter stickers- Nikki Sivils
button/twine
corner rounder
compass
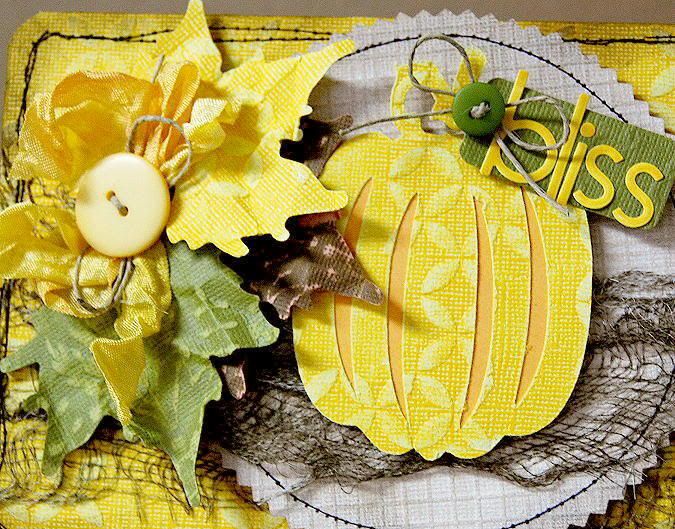
Instructions:
1. Adhere yellow cardstock to card base, then round corners and sand cardstock.
2. Ink edges of card with brown ink, then ink cheesecloth. Use High Tac to adhere cheese cloth to card front, then sew around edges of card.
3. Use compass to make circle, cut out with pinking scissors, ink edges and sew around edge. Adhere more cheese cloth across circle, adhere to card with UCutIt foam.
4. Cut out maple leaf from yellow, green and brown cardstock using die cut machine, sand pattern on cardstock and adhere to card with Perma Tac.

6. Layer pumpkin cut using die cut machine, sand and adhere to circle with UCutIt foam.
7. Handcut tag with green cardstock, tie onto pumpkin and adhere letters.
Paper Plate/Candy Treat Holder Inspiration
Link to original pin: http://pinterest.com/pin/96911651/
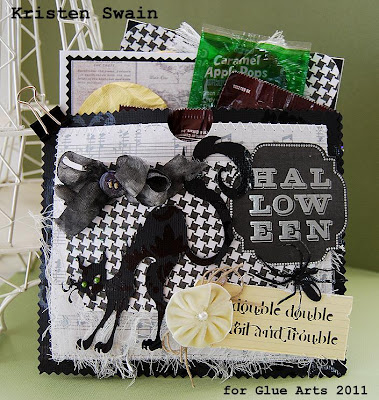
Paper Gift Pouch
GlueArts Designer: Kristen Swain
GlueArts Designer: Kristen Swain
Supplies:Glue Arts- UcutIt Foam, Glue Glider Pro with Perma tac and High Tac adhesives Extreme Adhesive Squares
Papers- DieCuts With a View, Imagine Vintage Papers Cartridge
Diecuts- Oct 31st Cartridge, Jubilee Cartridge ( using cricut machine)
Ribbon- www.scrapinkris.etsy.com
Buttons/twine/cheese cloth/pinking scissors- craft supply
flower- maya road
pearls- kaisercraft
tape- Pink Paislee
Papers- DieCuts With a View, Imagine Vintage Papers Cartridge
Diecuts- Oct 31st Cartridge, Jubilee Cartridge ( using cricut machine)
Ribbon- www.scrapinkris.etsy.com
Buttons/twine/cheese cloth/pinking scissors- craft supply
flower- maya road
pearls- kaisercraft
tape- Pink Paislee
Instructions:
1. Cut pouch from two layers of cardstock about 7x7 inches, trim edges with pinking scissors.
2. Cut block of music note paper, and sew cheesecloth on, then adhere to front of 7x7 paper. Sew the two layers together to create pouch- only sewing on three sides.
3. Punch circle of paper from top front of pouch to make getting items out easier.
4. Decorate pouch with quote blocks, die cut cat and spider, ribbon bow, twine and pearls.
Owl Card
1. Fold card to 5x7 inches, then cut block pf paper to fit card, mat with pinked mat in black, then sew strip of black cardstock, cheesecloth and decorative tape across card.
2. Cut out quote block, mount on card with UcutIt foam.
3. Punch circle of yellow, crumple and adhere to card with Extreme Adhesive Squares.
4. Diecut owl on branch, then adhere to card with UcutIt foam, adhere button and twine.
Moon card
1. Diecut frame with Cricut machine, adhere to card after mounting black cardstock to front of card with Perma Tac.
2. Adhere block of music paper to card, trimming corners with rounder and adhering ribbon vertically.
3. Use adhesive squares to add knot of cheesecloth to top of card.
4. Diecut moon from black cardstock and adhere to card with Extreme Adhesive Squares.
5. Cut out phrase and mount on card with UcutIt foam. Adhere button/twine with Adhesive Squares.
Tell me what your favorites are, and make sure you become a follower!
have a great weekend!




18 comments:
What a cute bag! I love the fun colors!
love the layouts very halloweeny.
Your designs are super special. The gift bag is fabulous. Thanks for sharing and the chance to win this great glue glider. I am a follower. patnbobcuddy at gmail dot com
without a doubt my fave is the bag :):):) Everything is so awesome tho :):) I've been a follower for quite a while and love your work! Thank you so much for a chance to win :)
Love the projects!!
Thank you for all of the eye candy plus the added treat of possibly winning some new Glue Arts products!
My fave project is your autumn card - so pretty. I love my glue glider pro so it would be fab to win the latest version. Thanks
I love, love, LOVE Glue Glider! And as usual, your creations are spectacular!
What great projects i really like your bag. Im a follower thanks so much for the giveaway!
-jamie
babyblueangel_30@yahoo.com
Yay!!!! I am sooo excited to see your work!!! Everything is adorable, as always!! But, that gift bag and little monsters are sooo stinkin' cute!!! I love that you tied the cheese cloth on!! What a fab idea!!!
I always enjoy seeing the envelops to hold different things=your bag is really cute too.
I am a follower and your projects are fabulous. Love the owl card and the autumn bliss card. Would love to win a glue glider.
slrdowney at hotmail dot com
That gift bag is adorable!! I'm a follower!
OHHH! I love the new glue glider--can't wait to get one!!! LOVE LOVE LOVE that yellow pumpkin on the Bliss Autumn card--FAB!
I love the halloween bag too...fabulous projects!
Kristin all of your projects are just amazing. I love coming here for inspiration. Linda Harris Lsunflower58@aol.com
That treat bag is monsteriffic. Love the cards. TFS.
How generous of you! I love all of the projects but especially your bliss card, the colors and the gauze. Thanks for sharing.
Katie B.
Post a Comment